I am always interested in trying new techniques so after seeing a few blog posts about Amy’s Great Cakes Soapworks Soap Challenge, I decided to join this month’s challenge. This month, we had to use the column pour technique in a soap design.
This was my first time trying this technique and I may have been a bit over-ambitious for my first attempt.
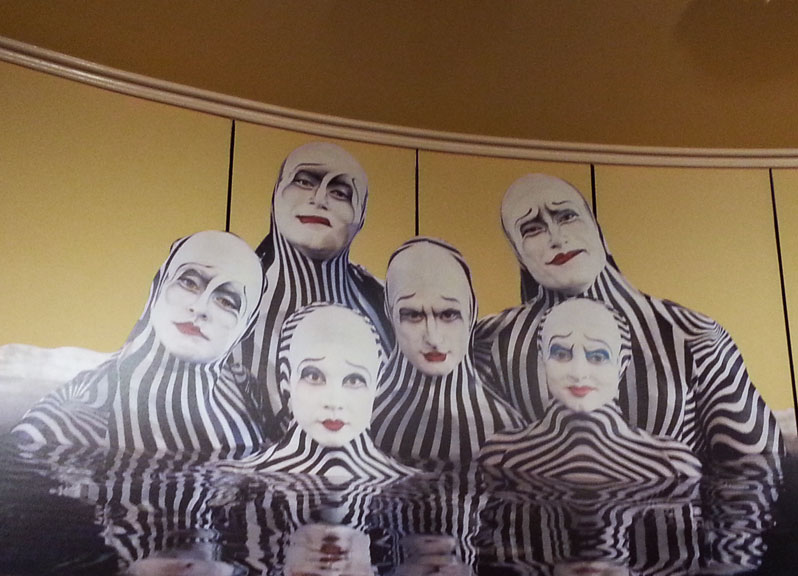
Two weeks ago, I was in Las Vegas walking through the Bellagio and I saw this display for the Cirque Du Soleil “O” show.

“Wow! These are really cool colors to use in a soap design.” I thought.
I also spotted this poster of the Cirque Du Soleil “O” Zebra characters in a Bellagio gift shop. I became even more excited and wanted to try to mirror the stripes of the Zebras in a soap design.
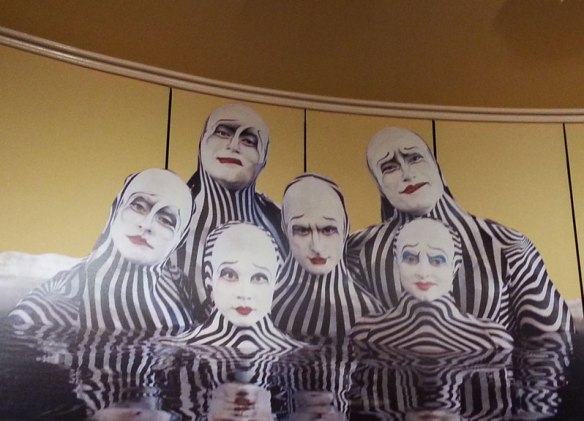
Cirque-Du-Soleil O: The Zebras
I was so inspired by the idea that I bought a new slab mold just for the trial. I love this slab mold because all the side panels can be disassembled for easy soap removal.
For the columns, I used these wooden beads shaped like a star and block. I taped sections together and wrapped them in plastic wrap.
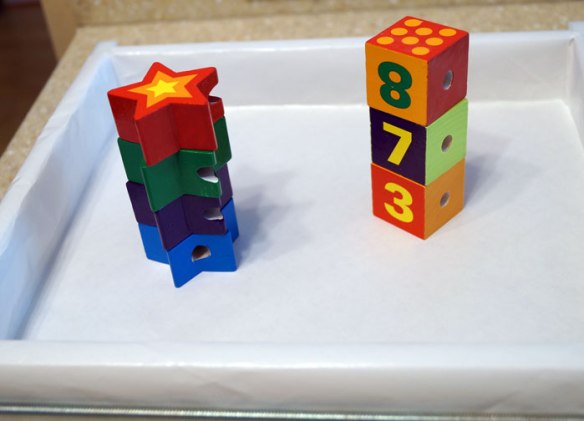
Blocks and Slab Mold for Column Pour Challenge
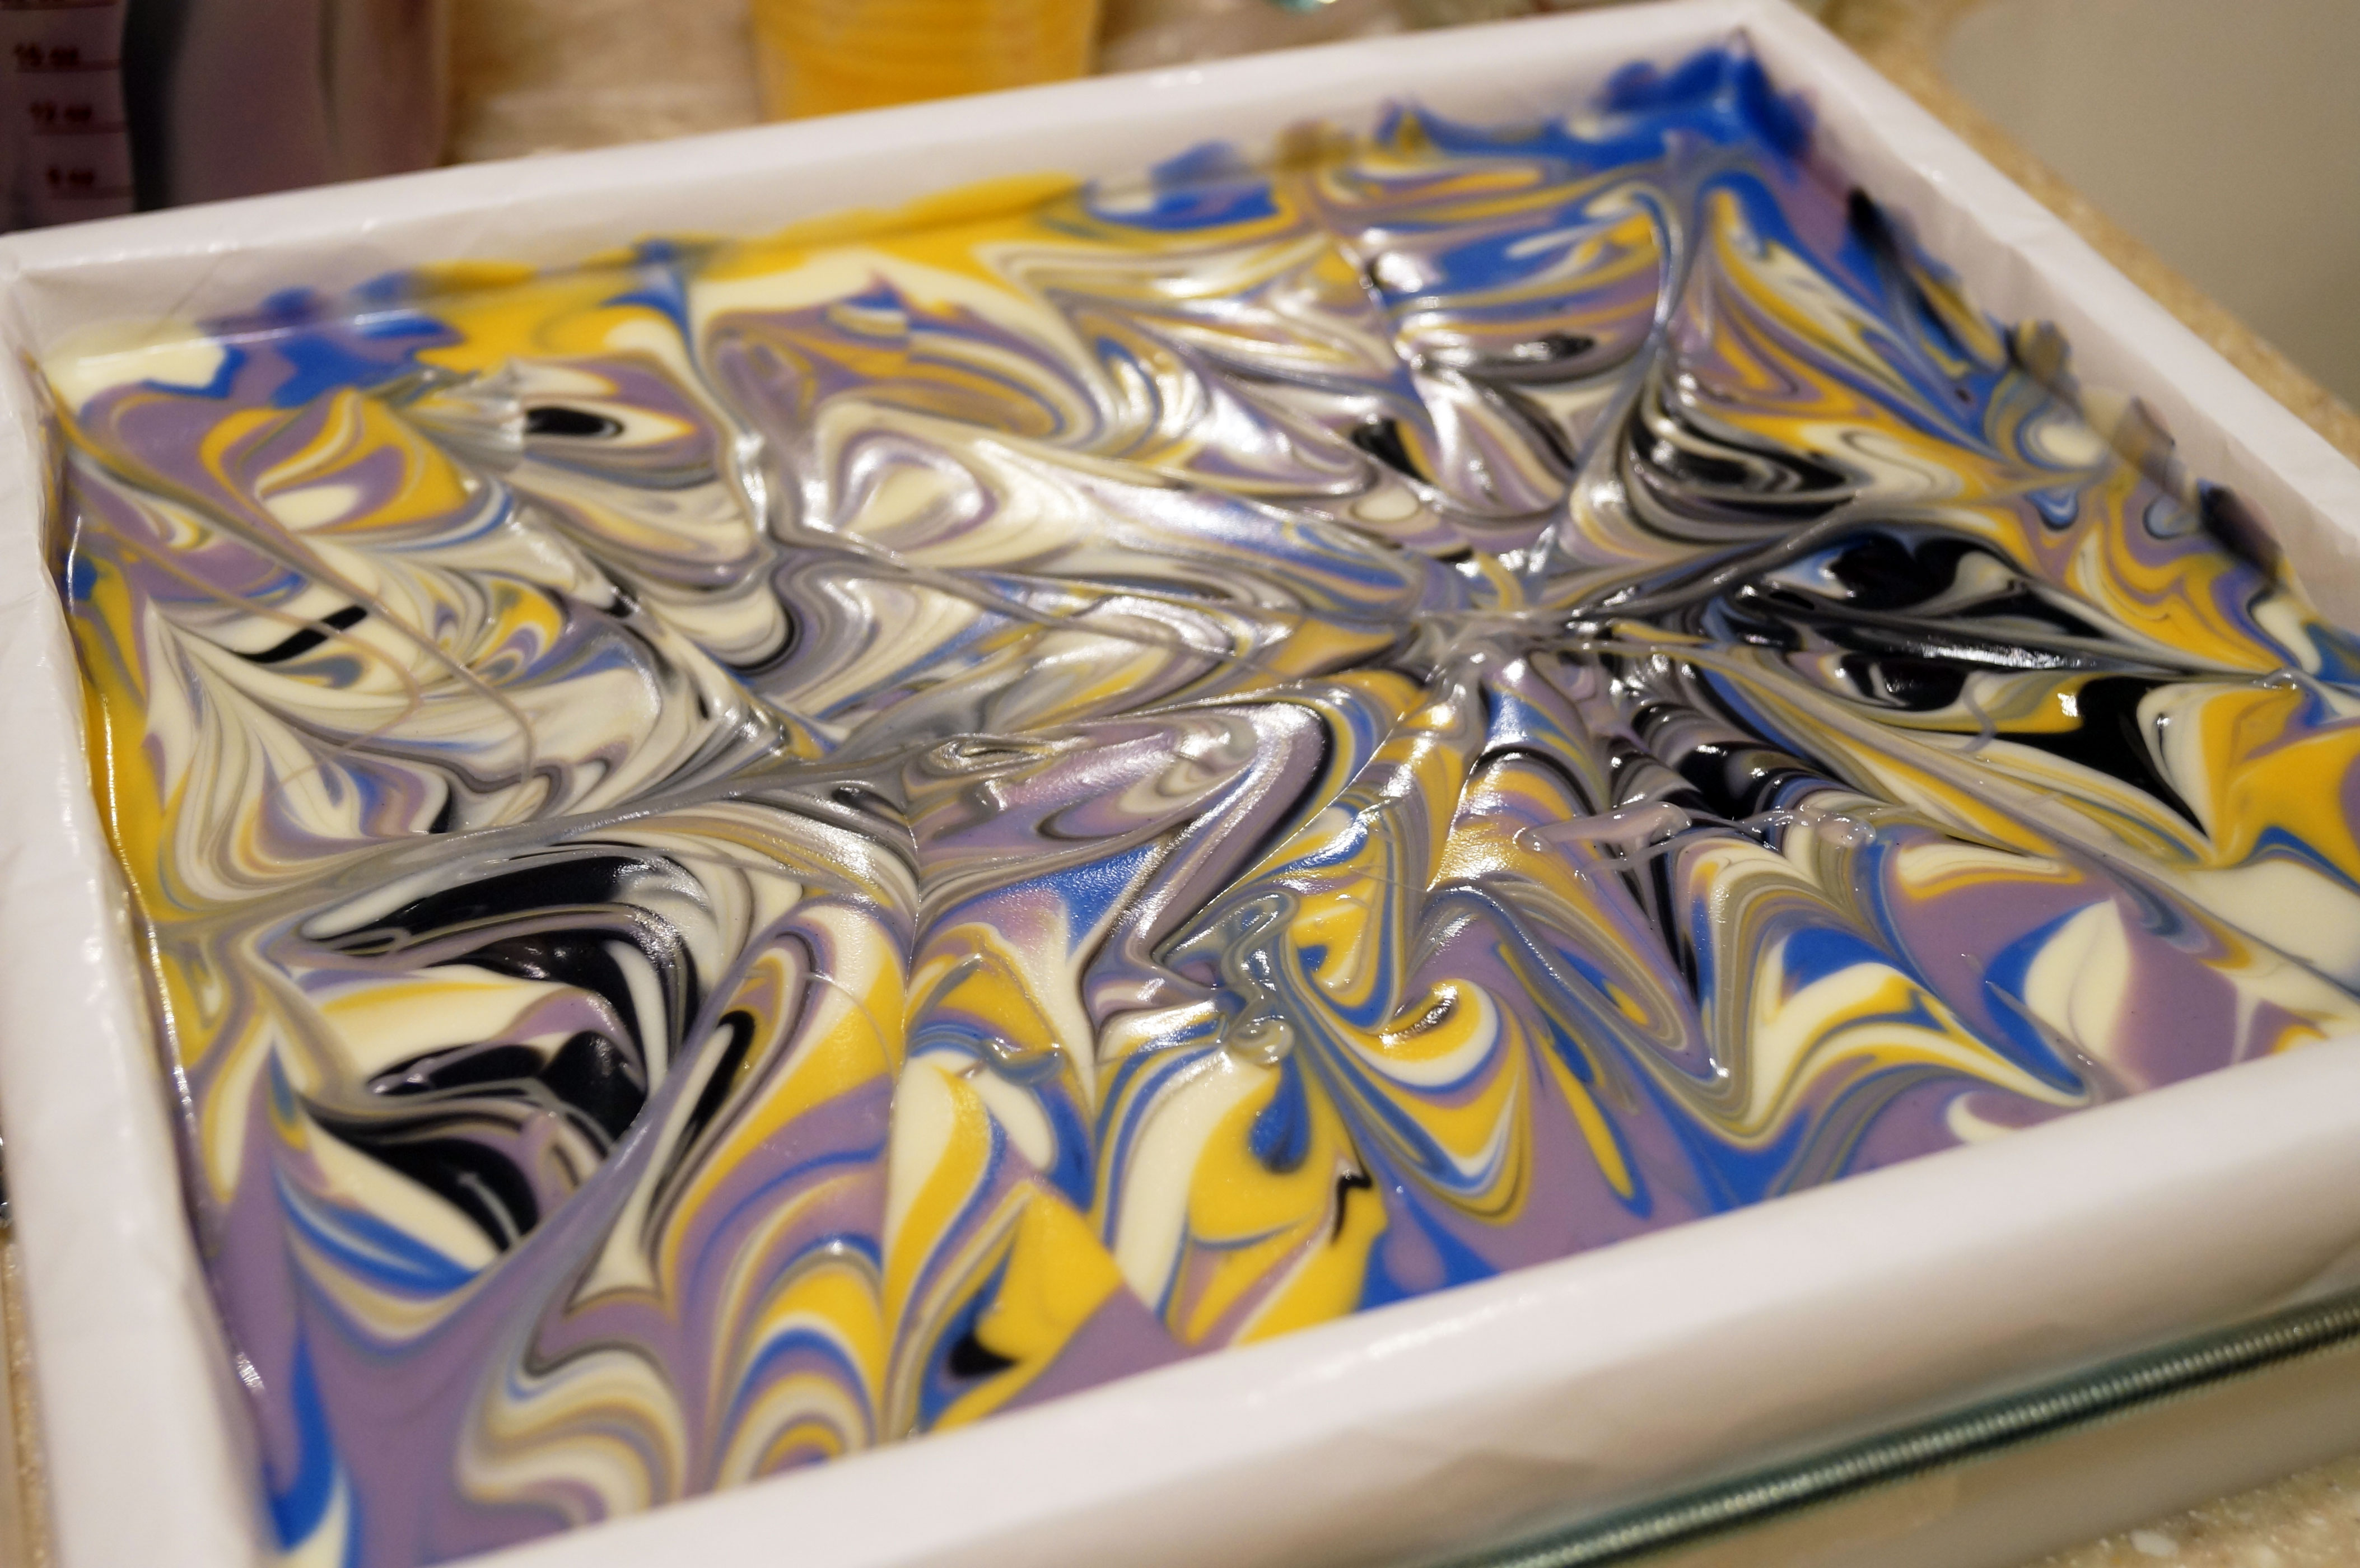
Big plans, big dreams………. foiled by heavy trace in 3 out of the 5 colors. 😉
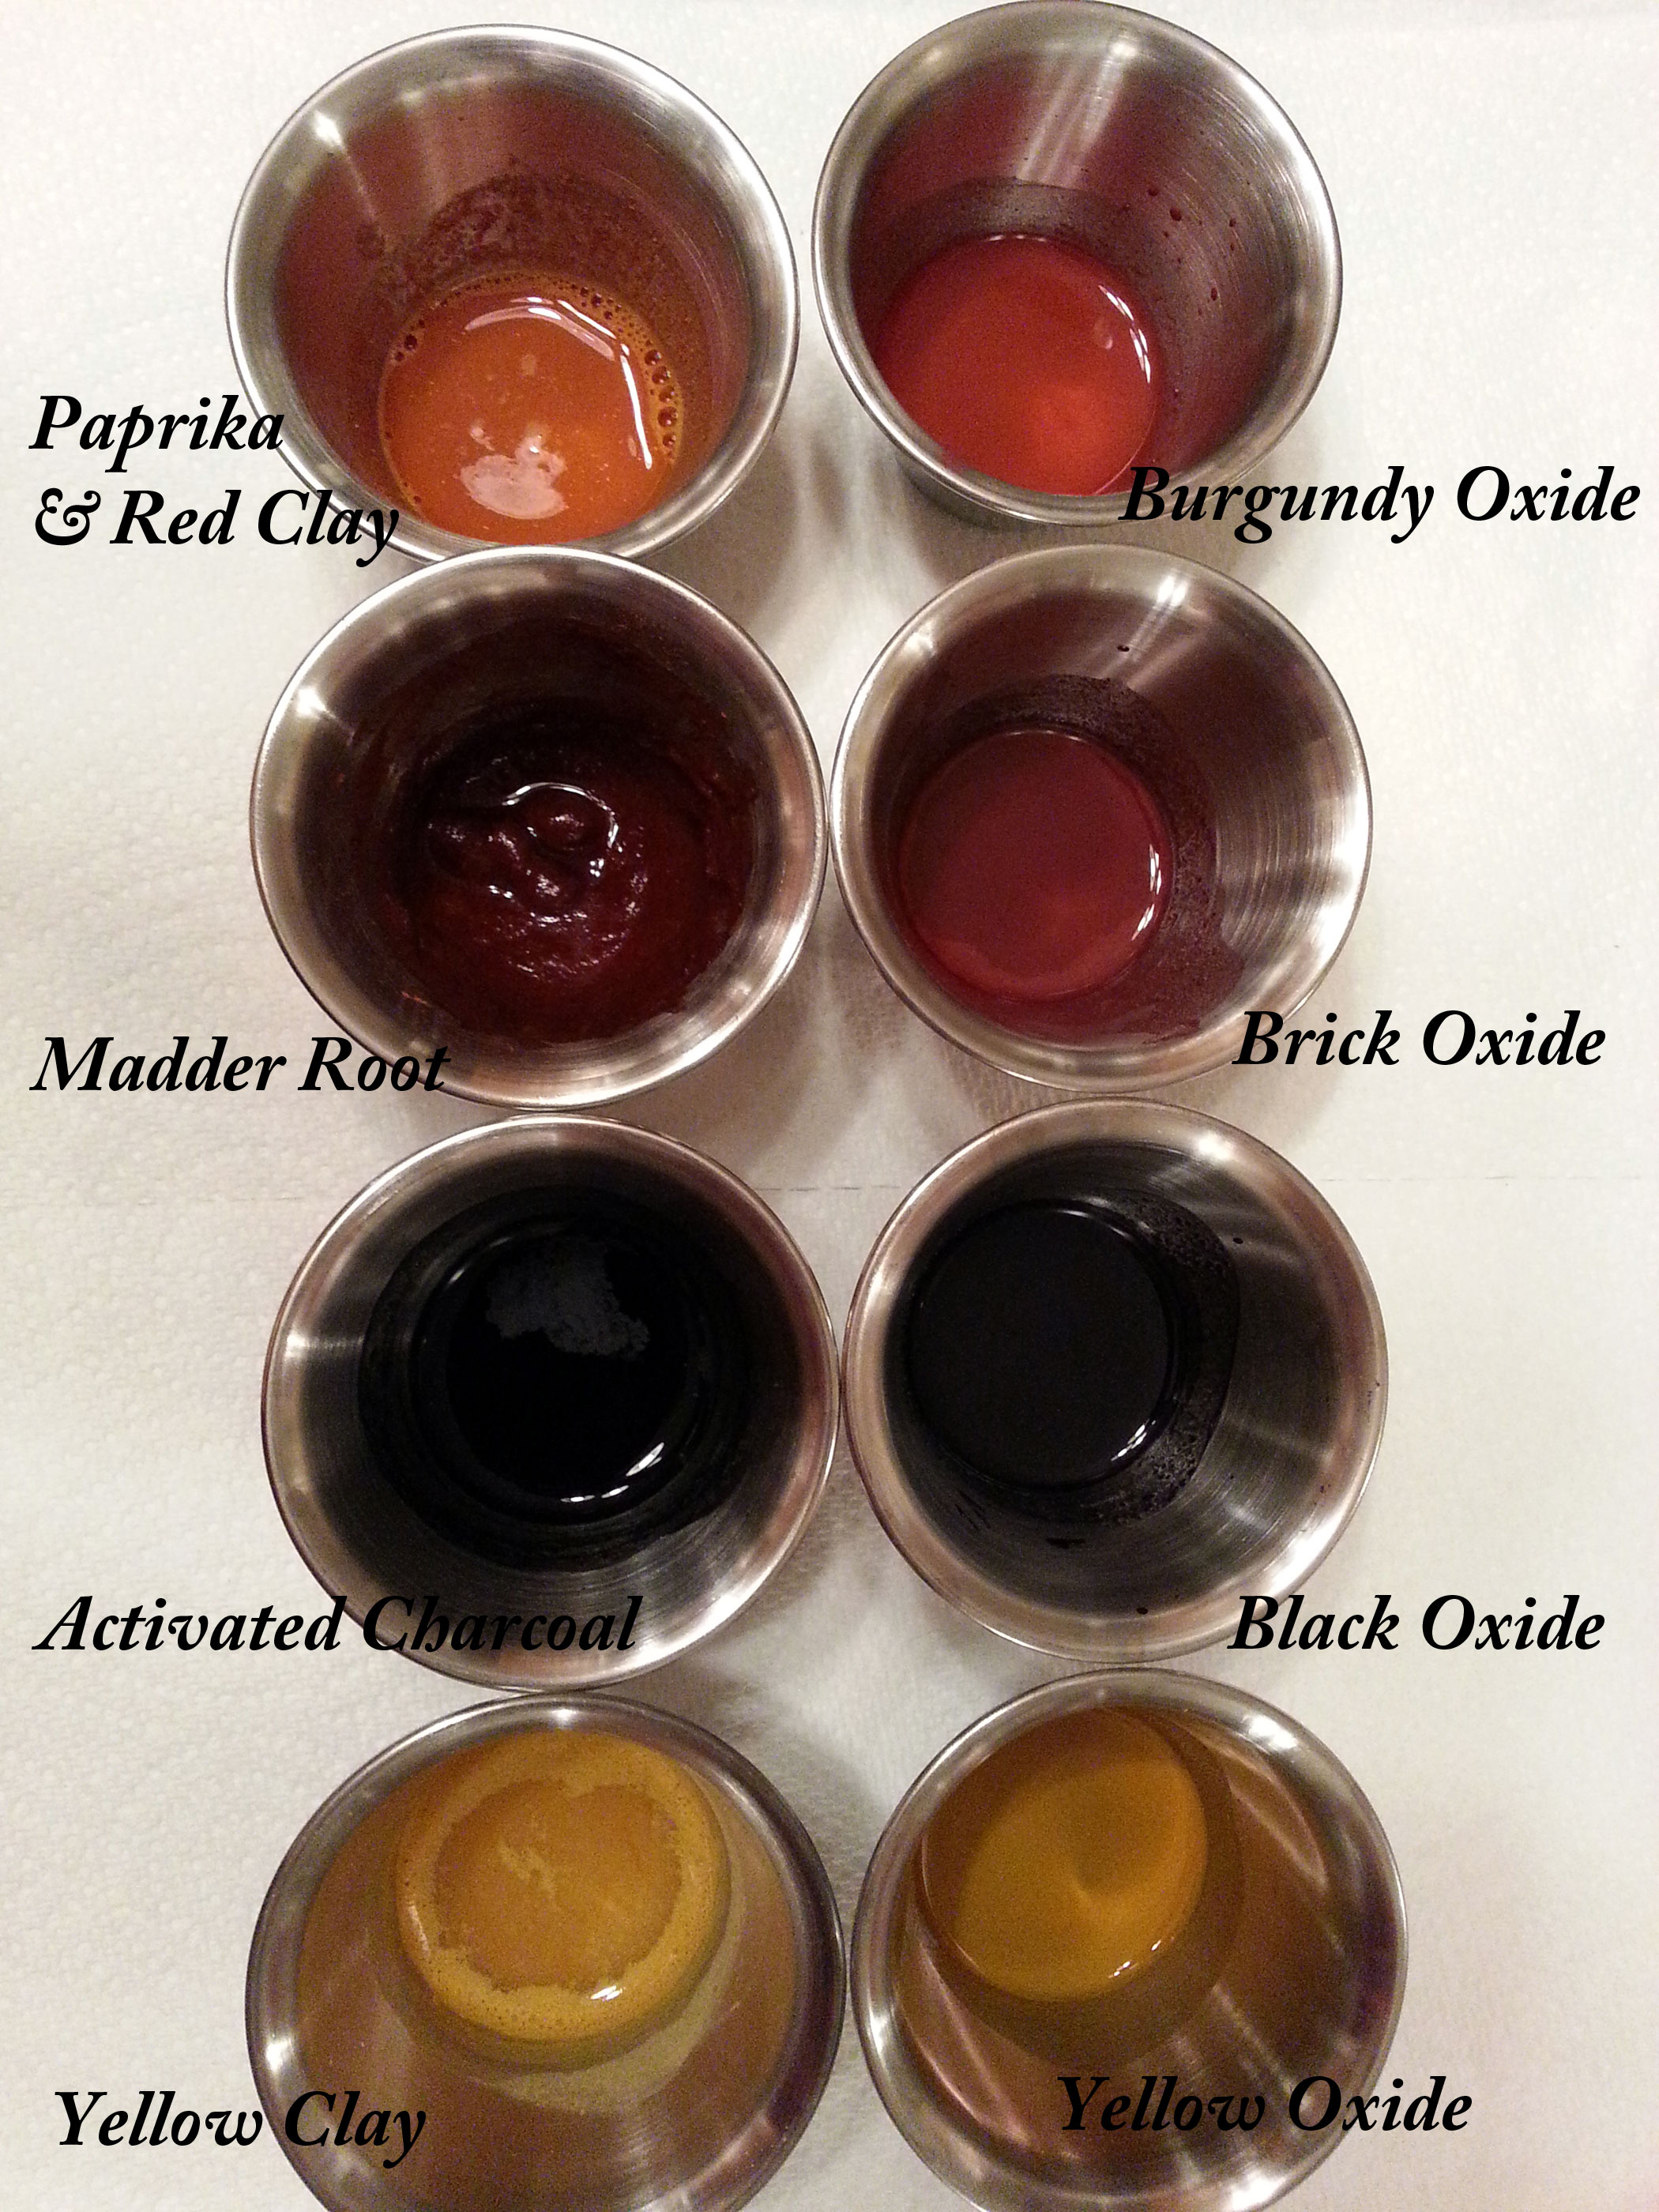
For the soap base, I used slow-moving olive, almond and canola oils along with palm, coconut and palm kernel oils. For the design, I used 5 different colors: yellow oxide, ultramarine blue, ultramarine violet, black oxide and white (titanium dioxide). After mixing in the colorants, I added citrus-smelling “Energy” fragrance oil to the soap mixtures.
The white and violet mixtures were at light trace and flowed easily on the blocks. However, the black, yellow and blue soap mixtures were very viscous and hard to pour on the blocks. I just managed to get all the soap poured in the mold before it became very thick and gloppy.
Mr. Ecoviolet was my photographer for the occasion and after seeing my dismay wanted to help. “OK” I told him. “Take these chopsticks and just make radial lines from where I took out the blocks”.
He nodded in understanding and proceeded to make huge random zigzags and swirls with the chopsticks. Argh!!! I probably should have been more specific about what I meant by “radial lines”.
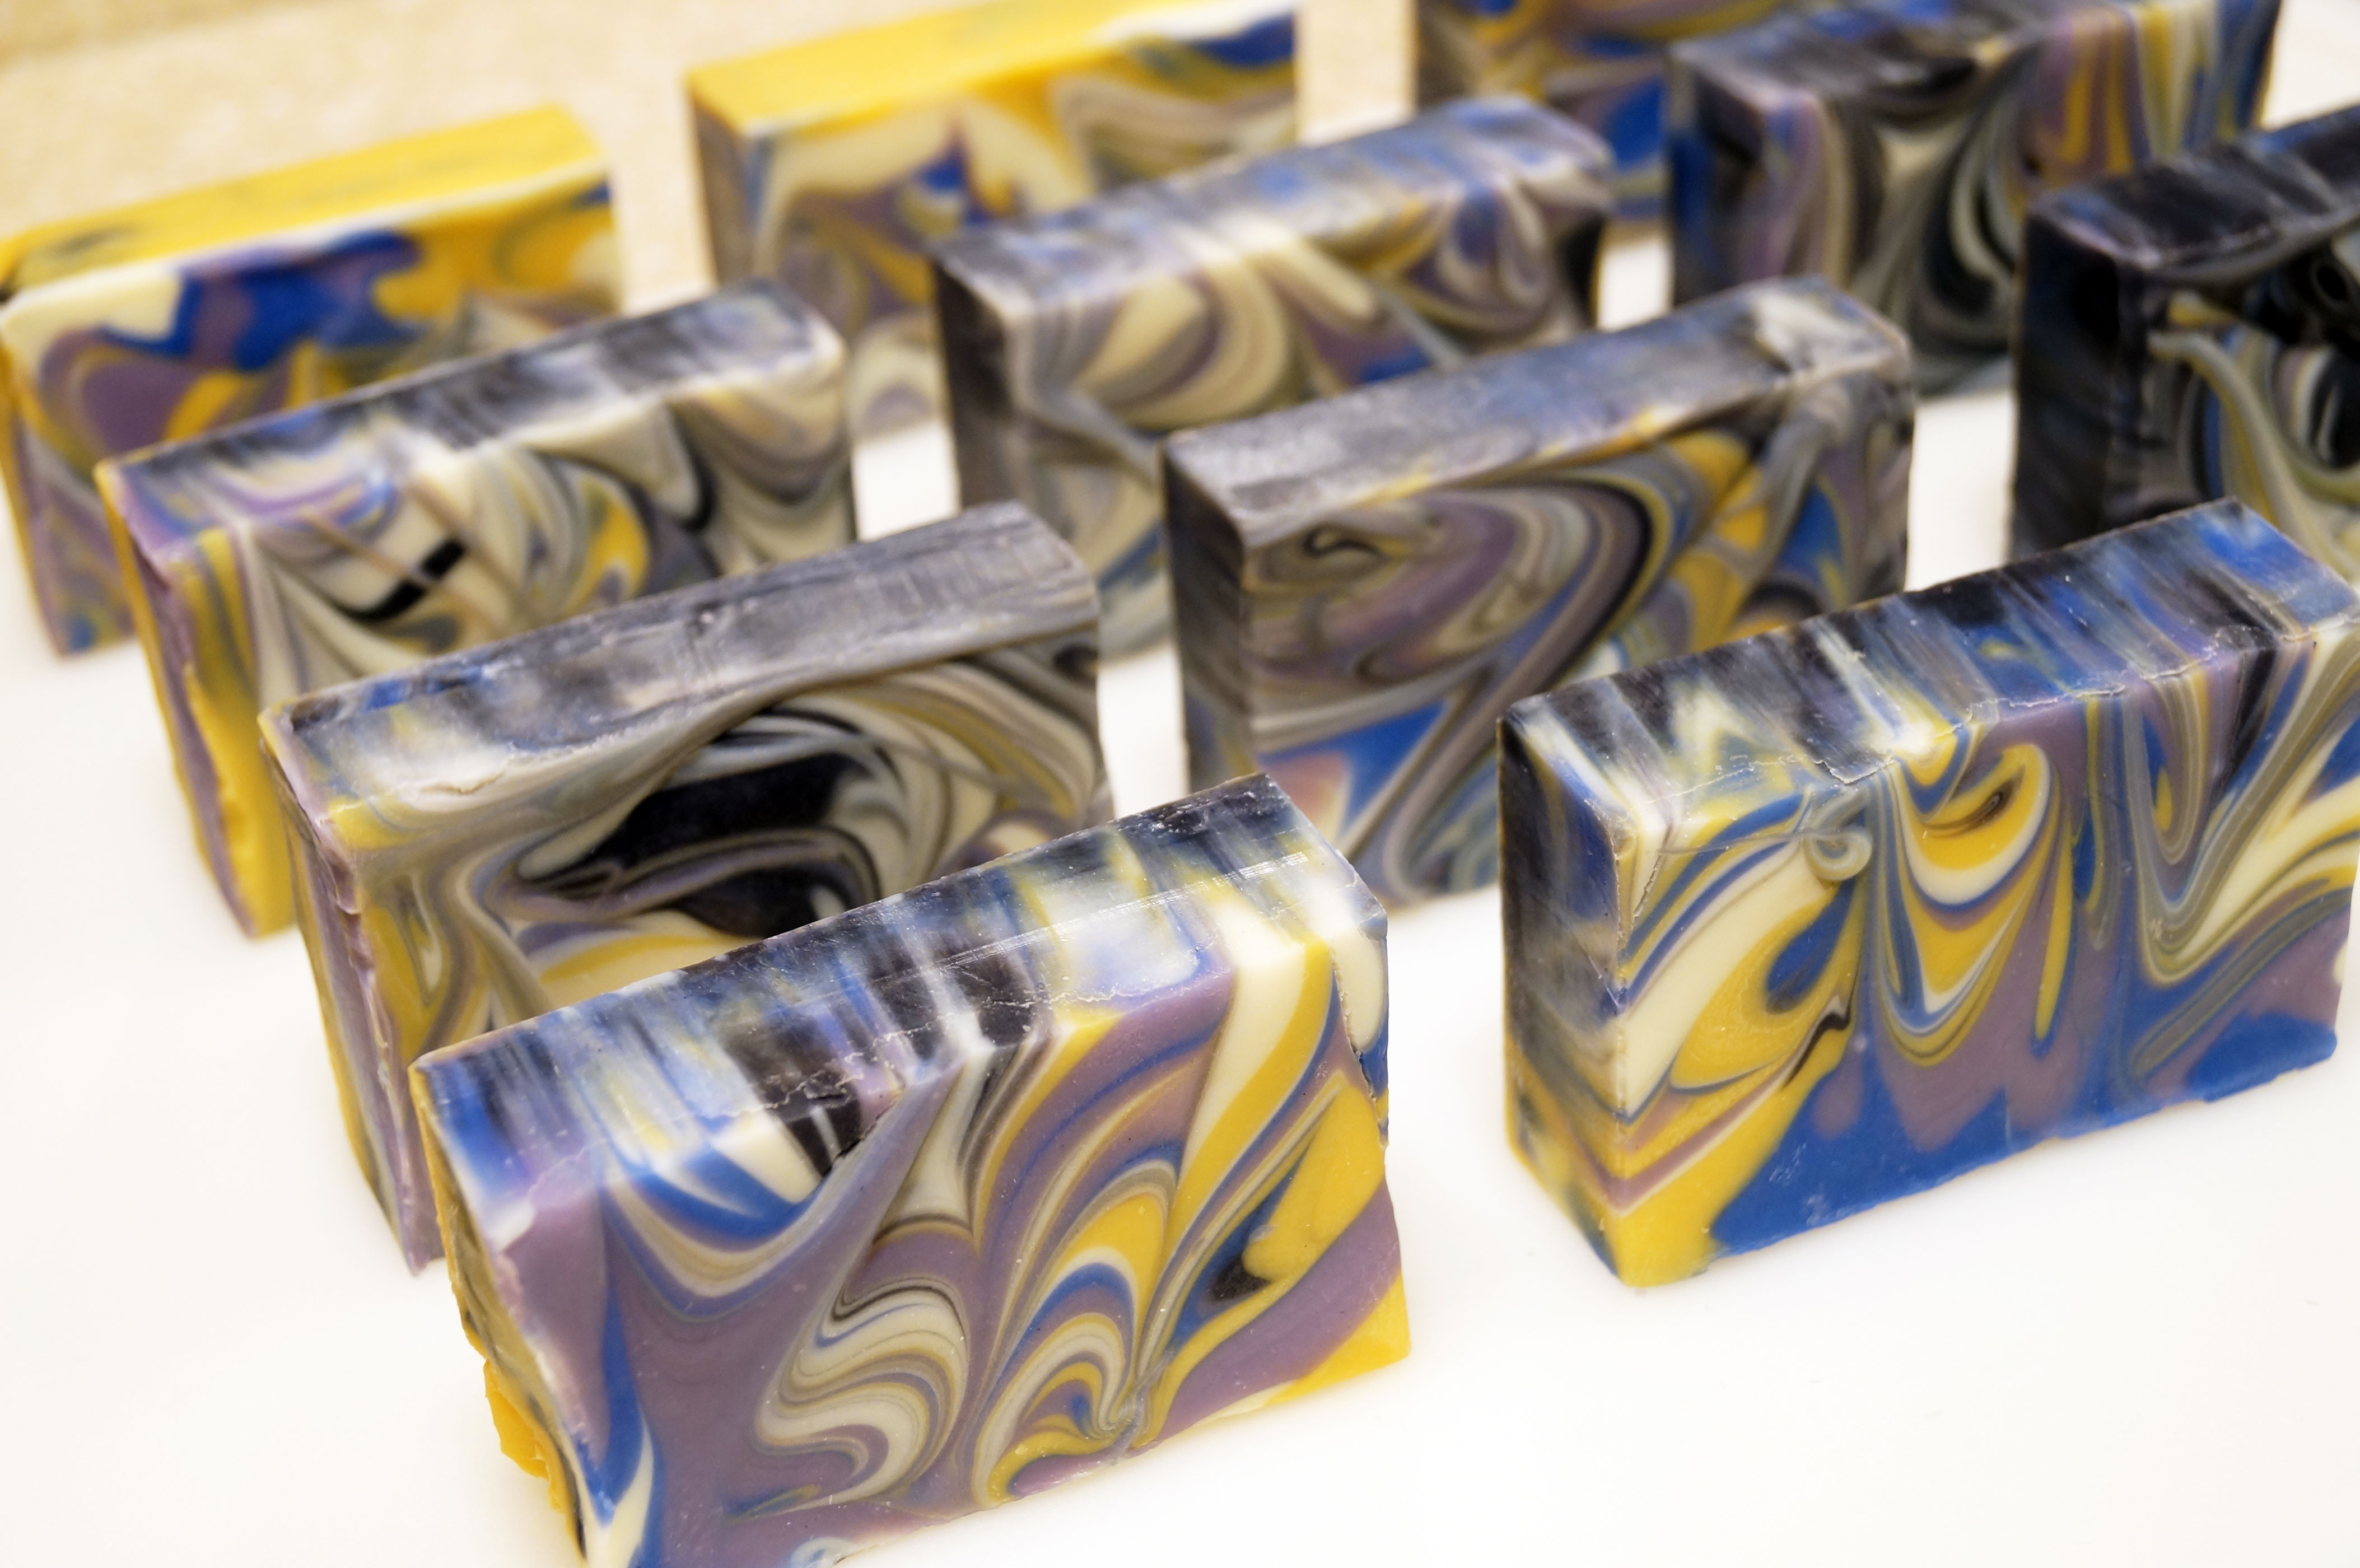
I did go back and draw lines radiating from where the blocks where in the soap and this is what we ended up with. It doesn’t look like a typical column pour soap but I still think it looks pretty good.

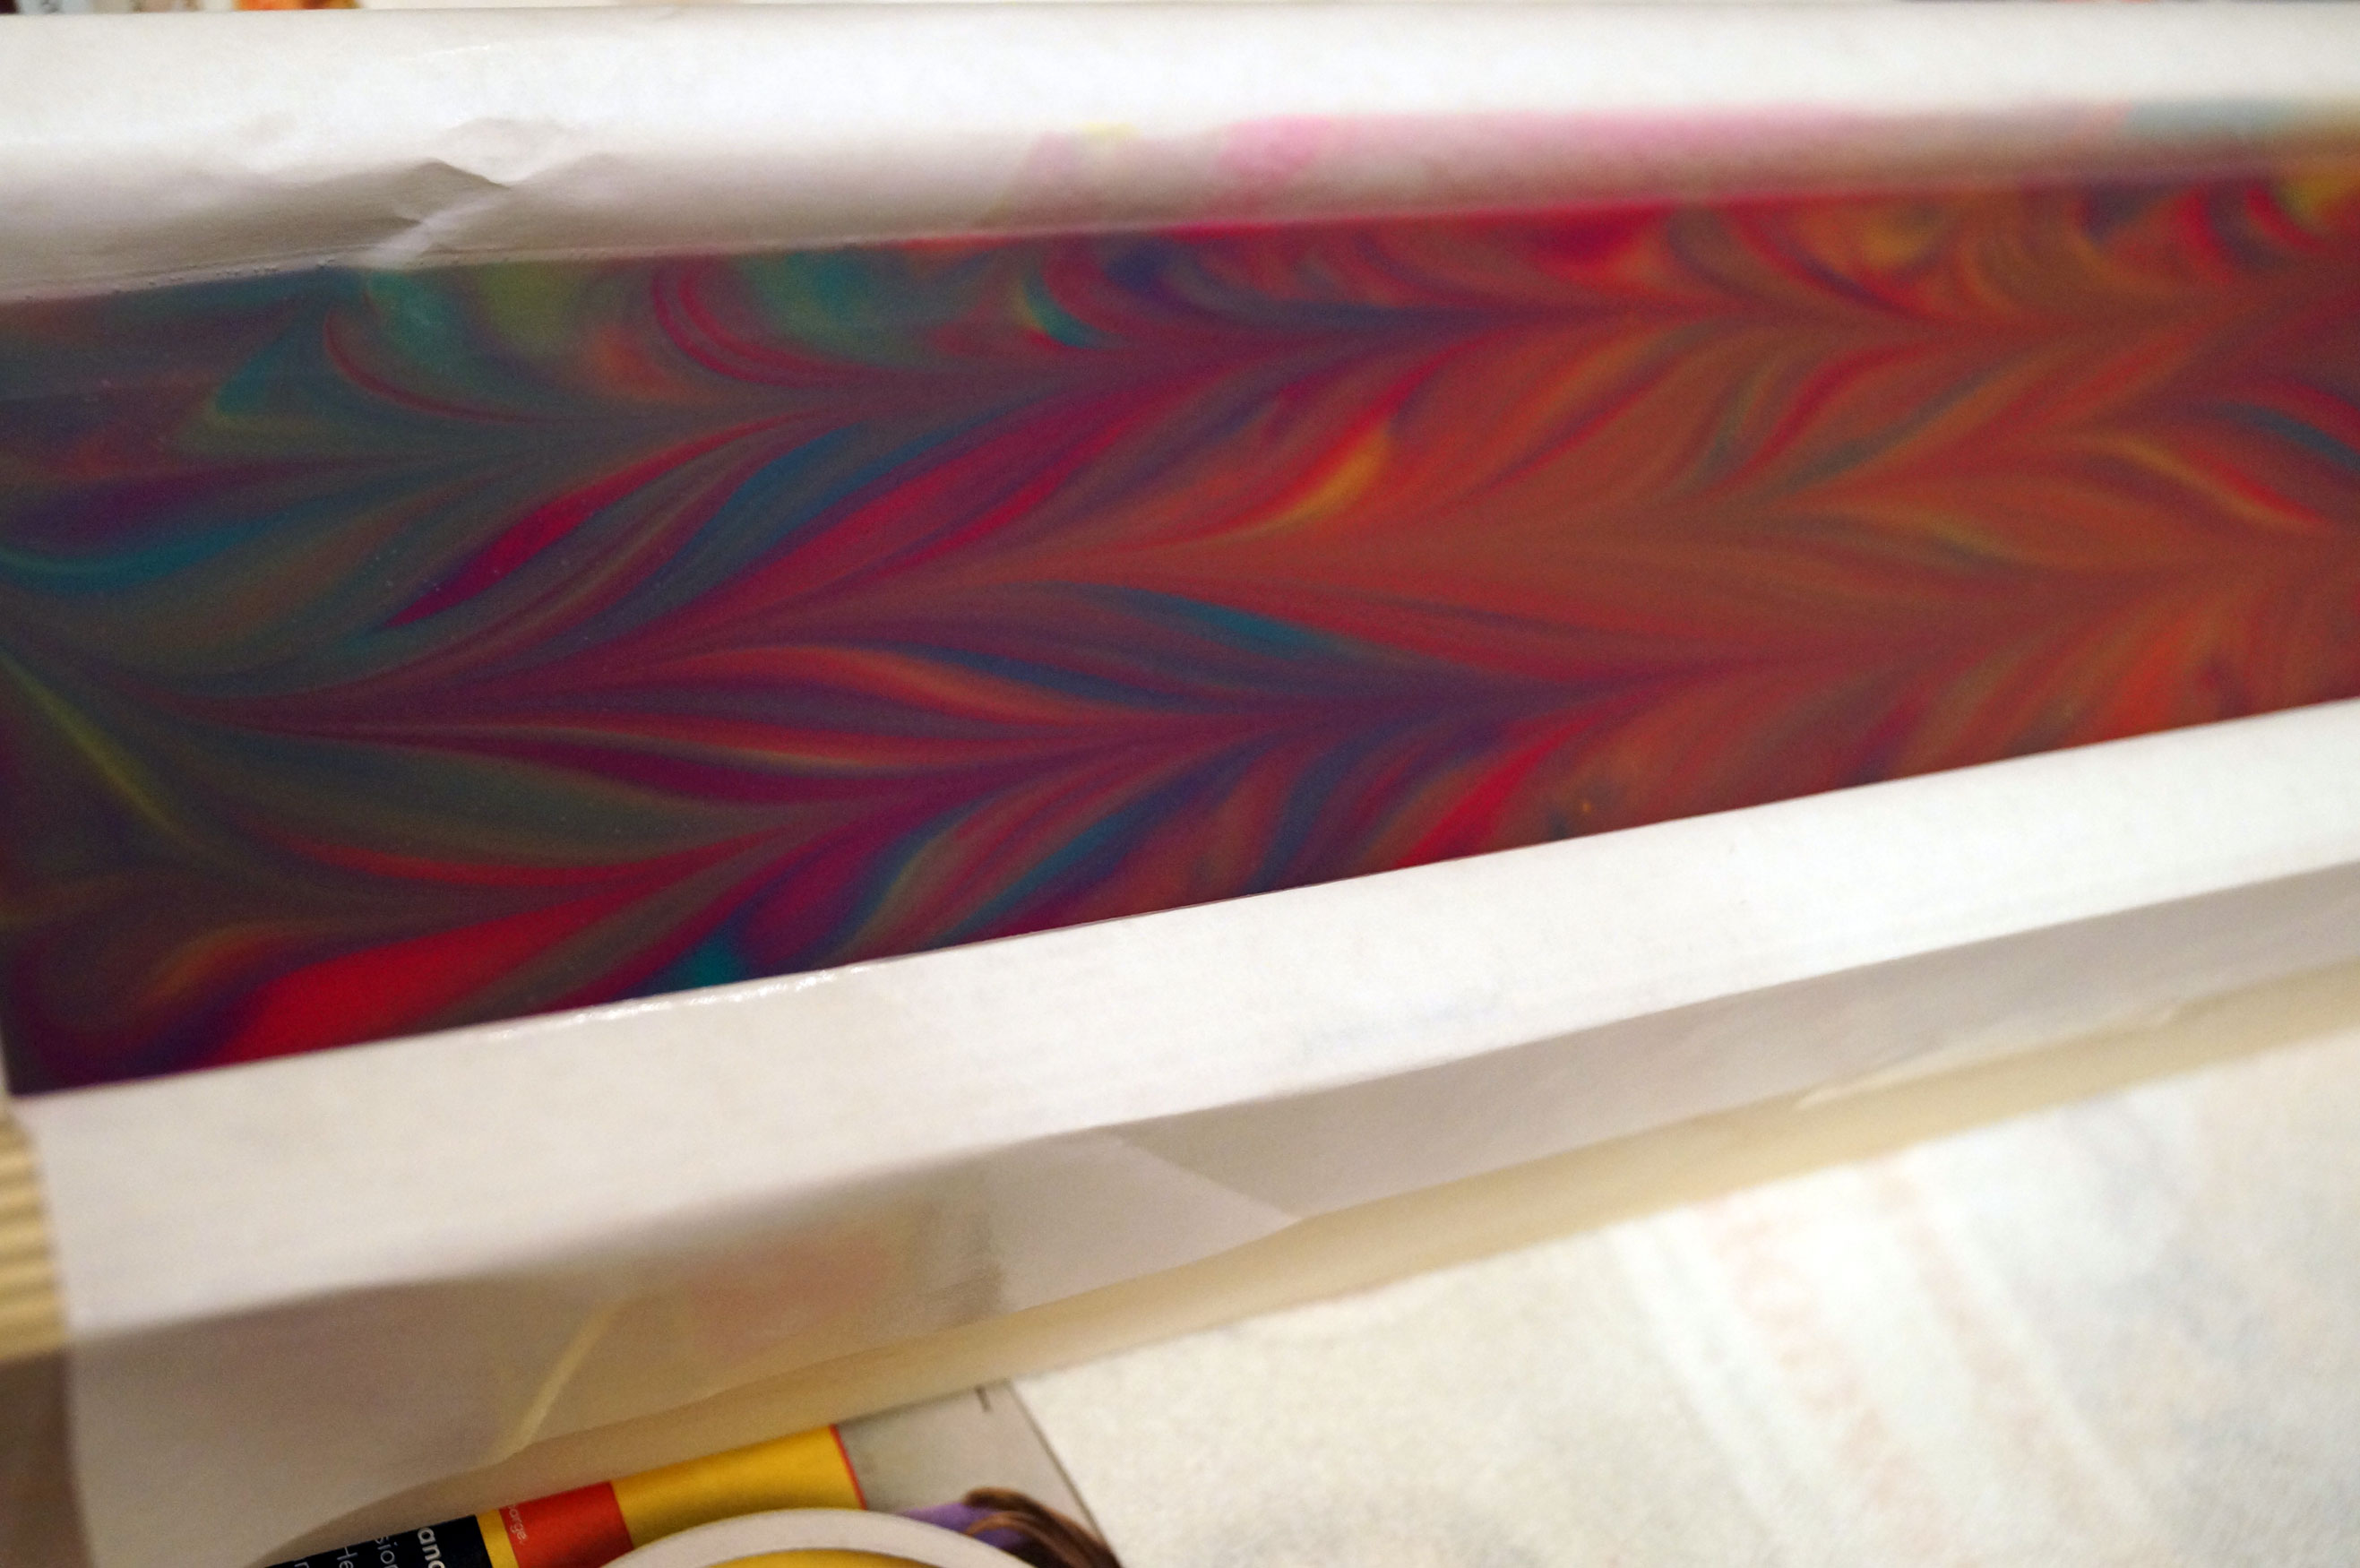
Soap after pour
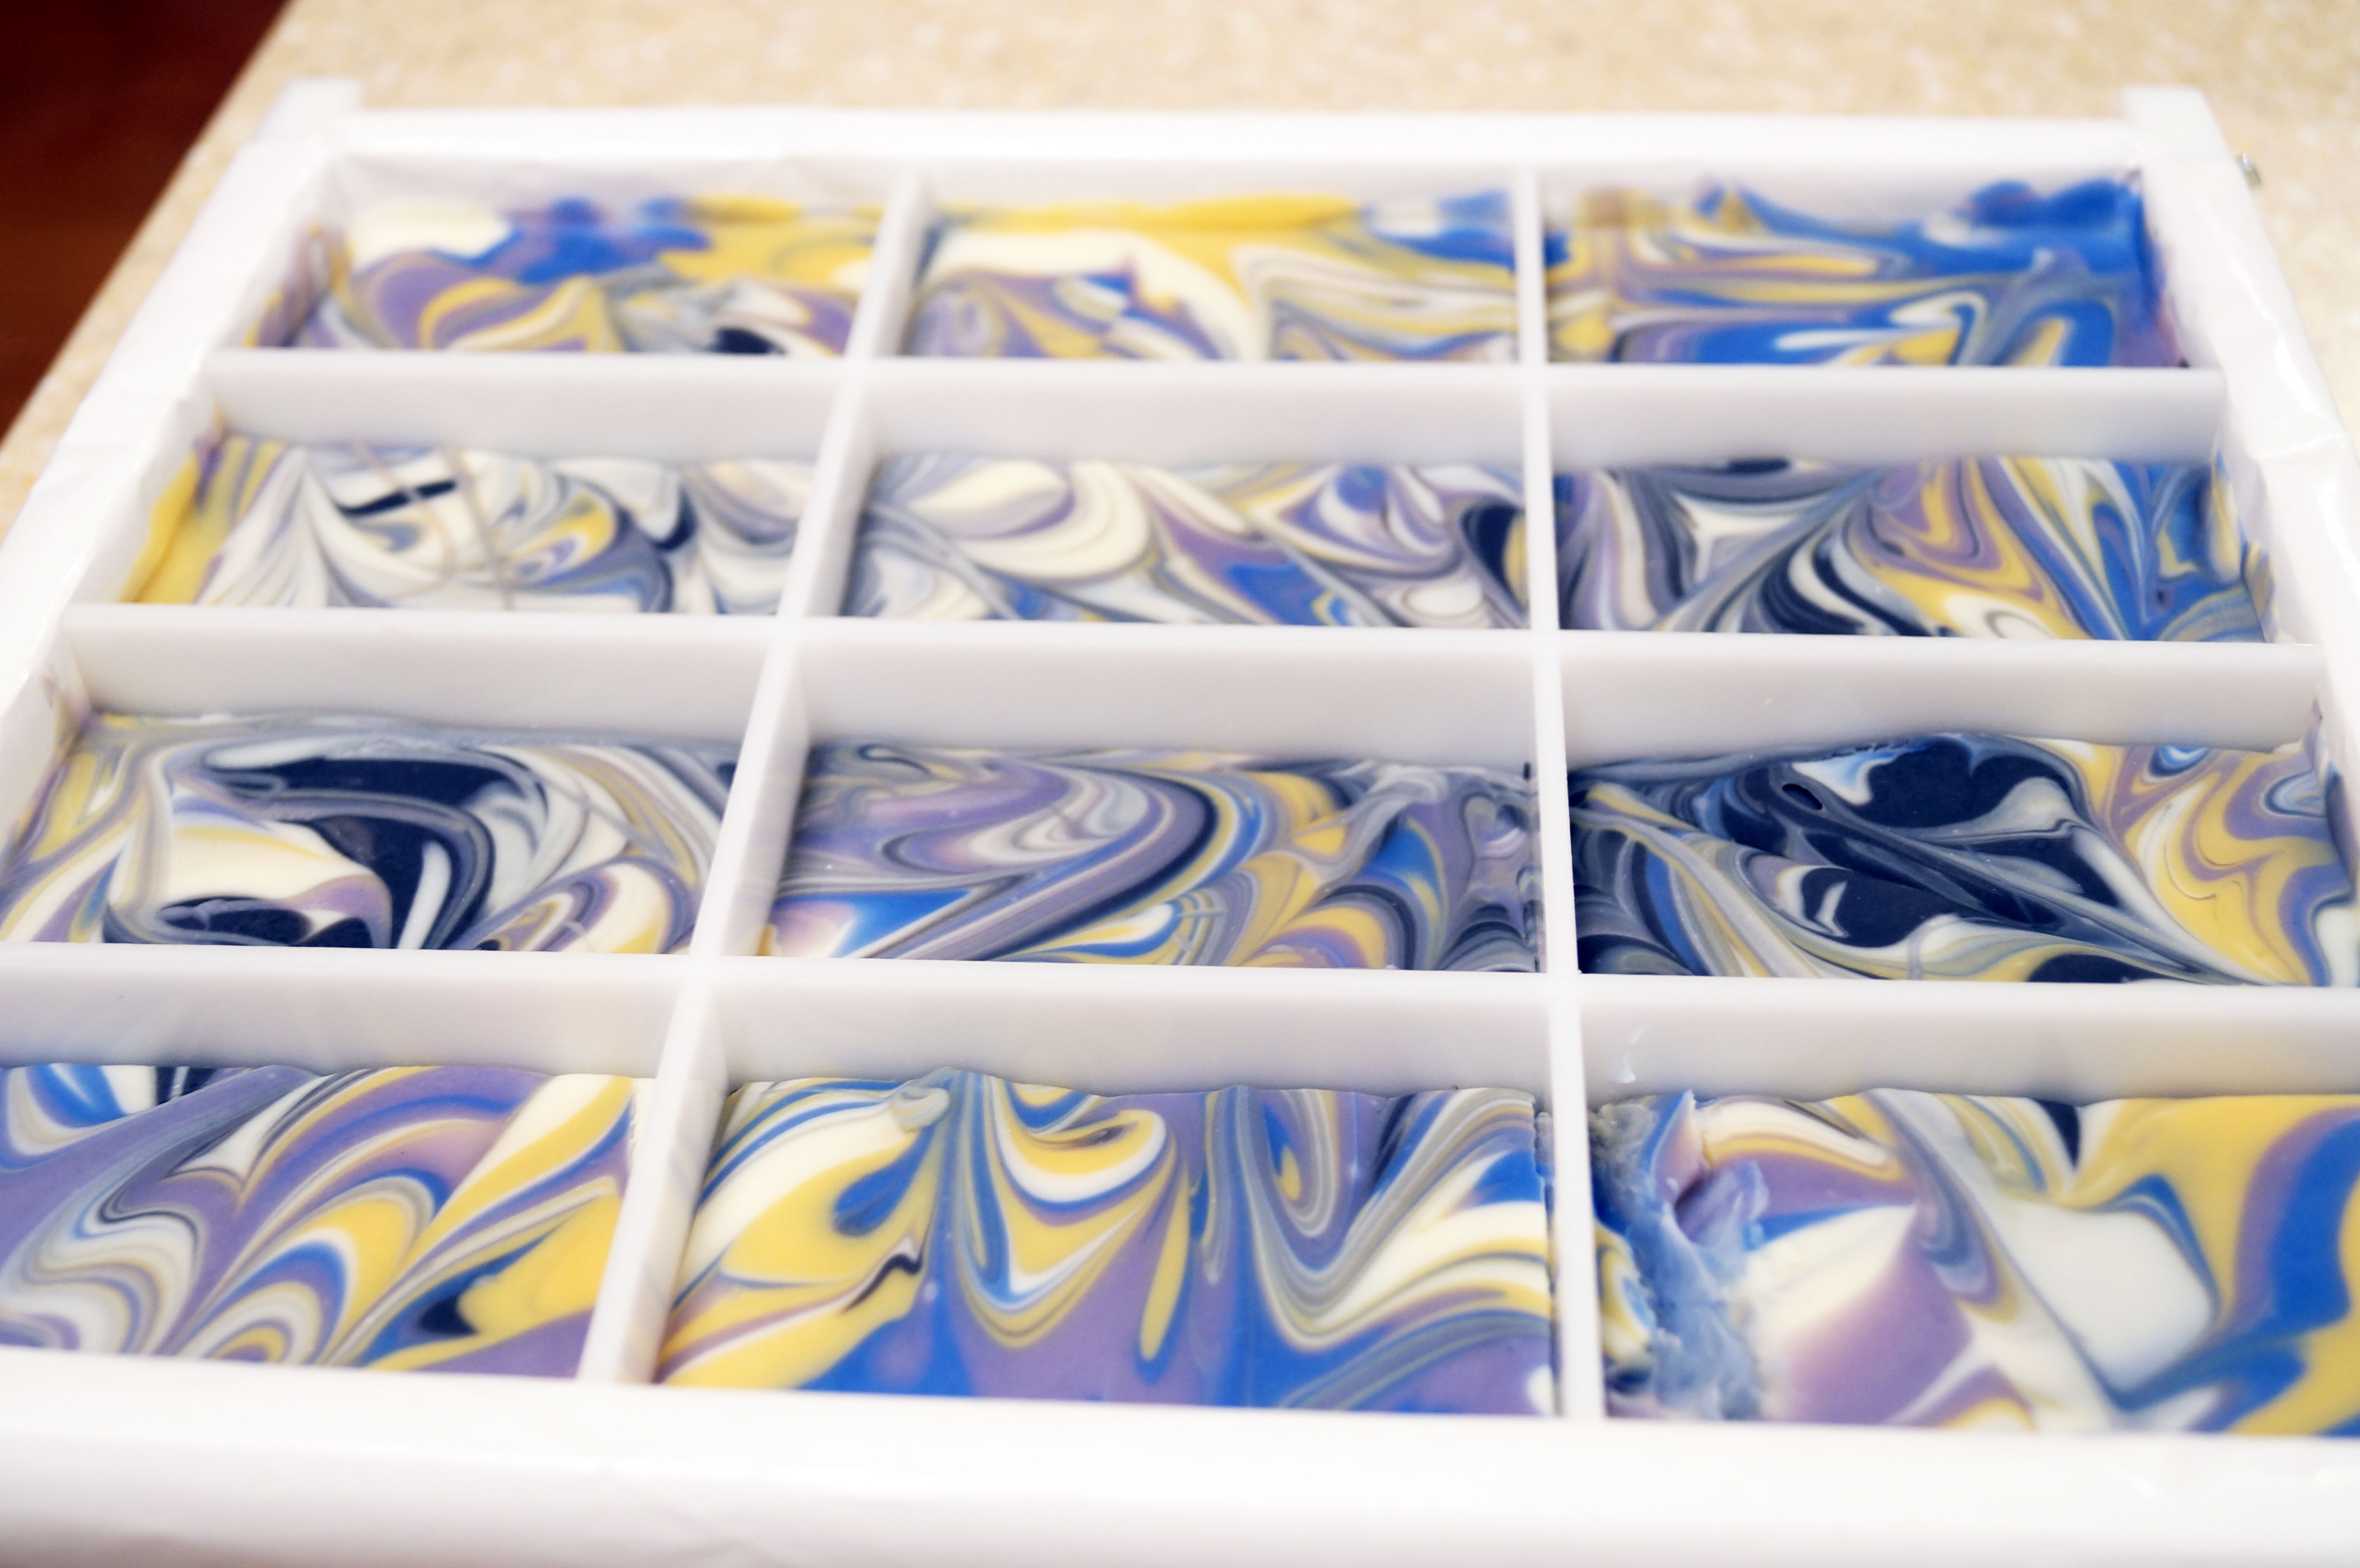
The colors became more vibrant as the soap went through gel stage. Here is the soap after 4 hours of cure time.

Column pour soap after 4 hours
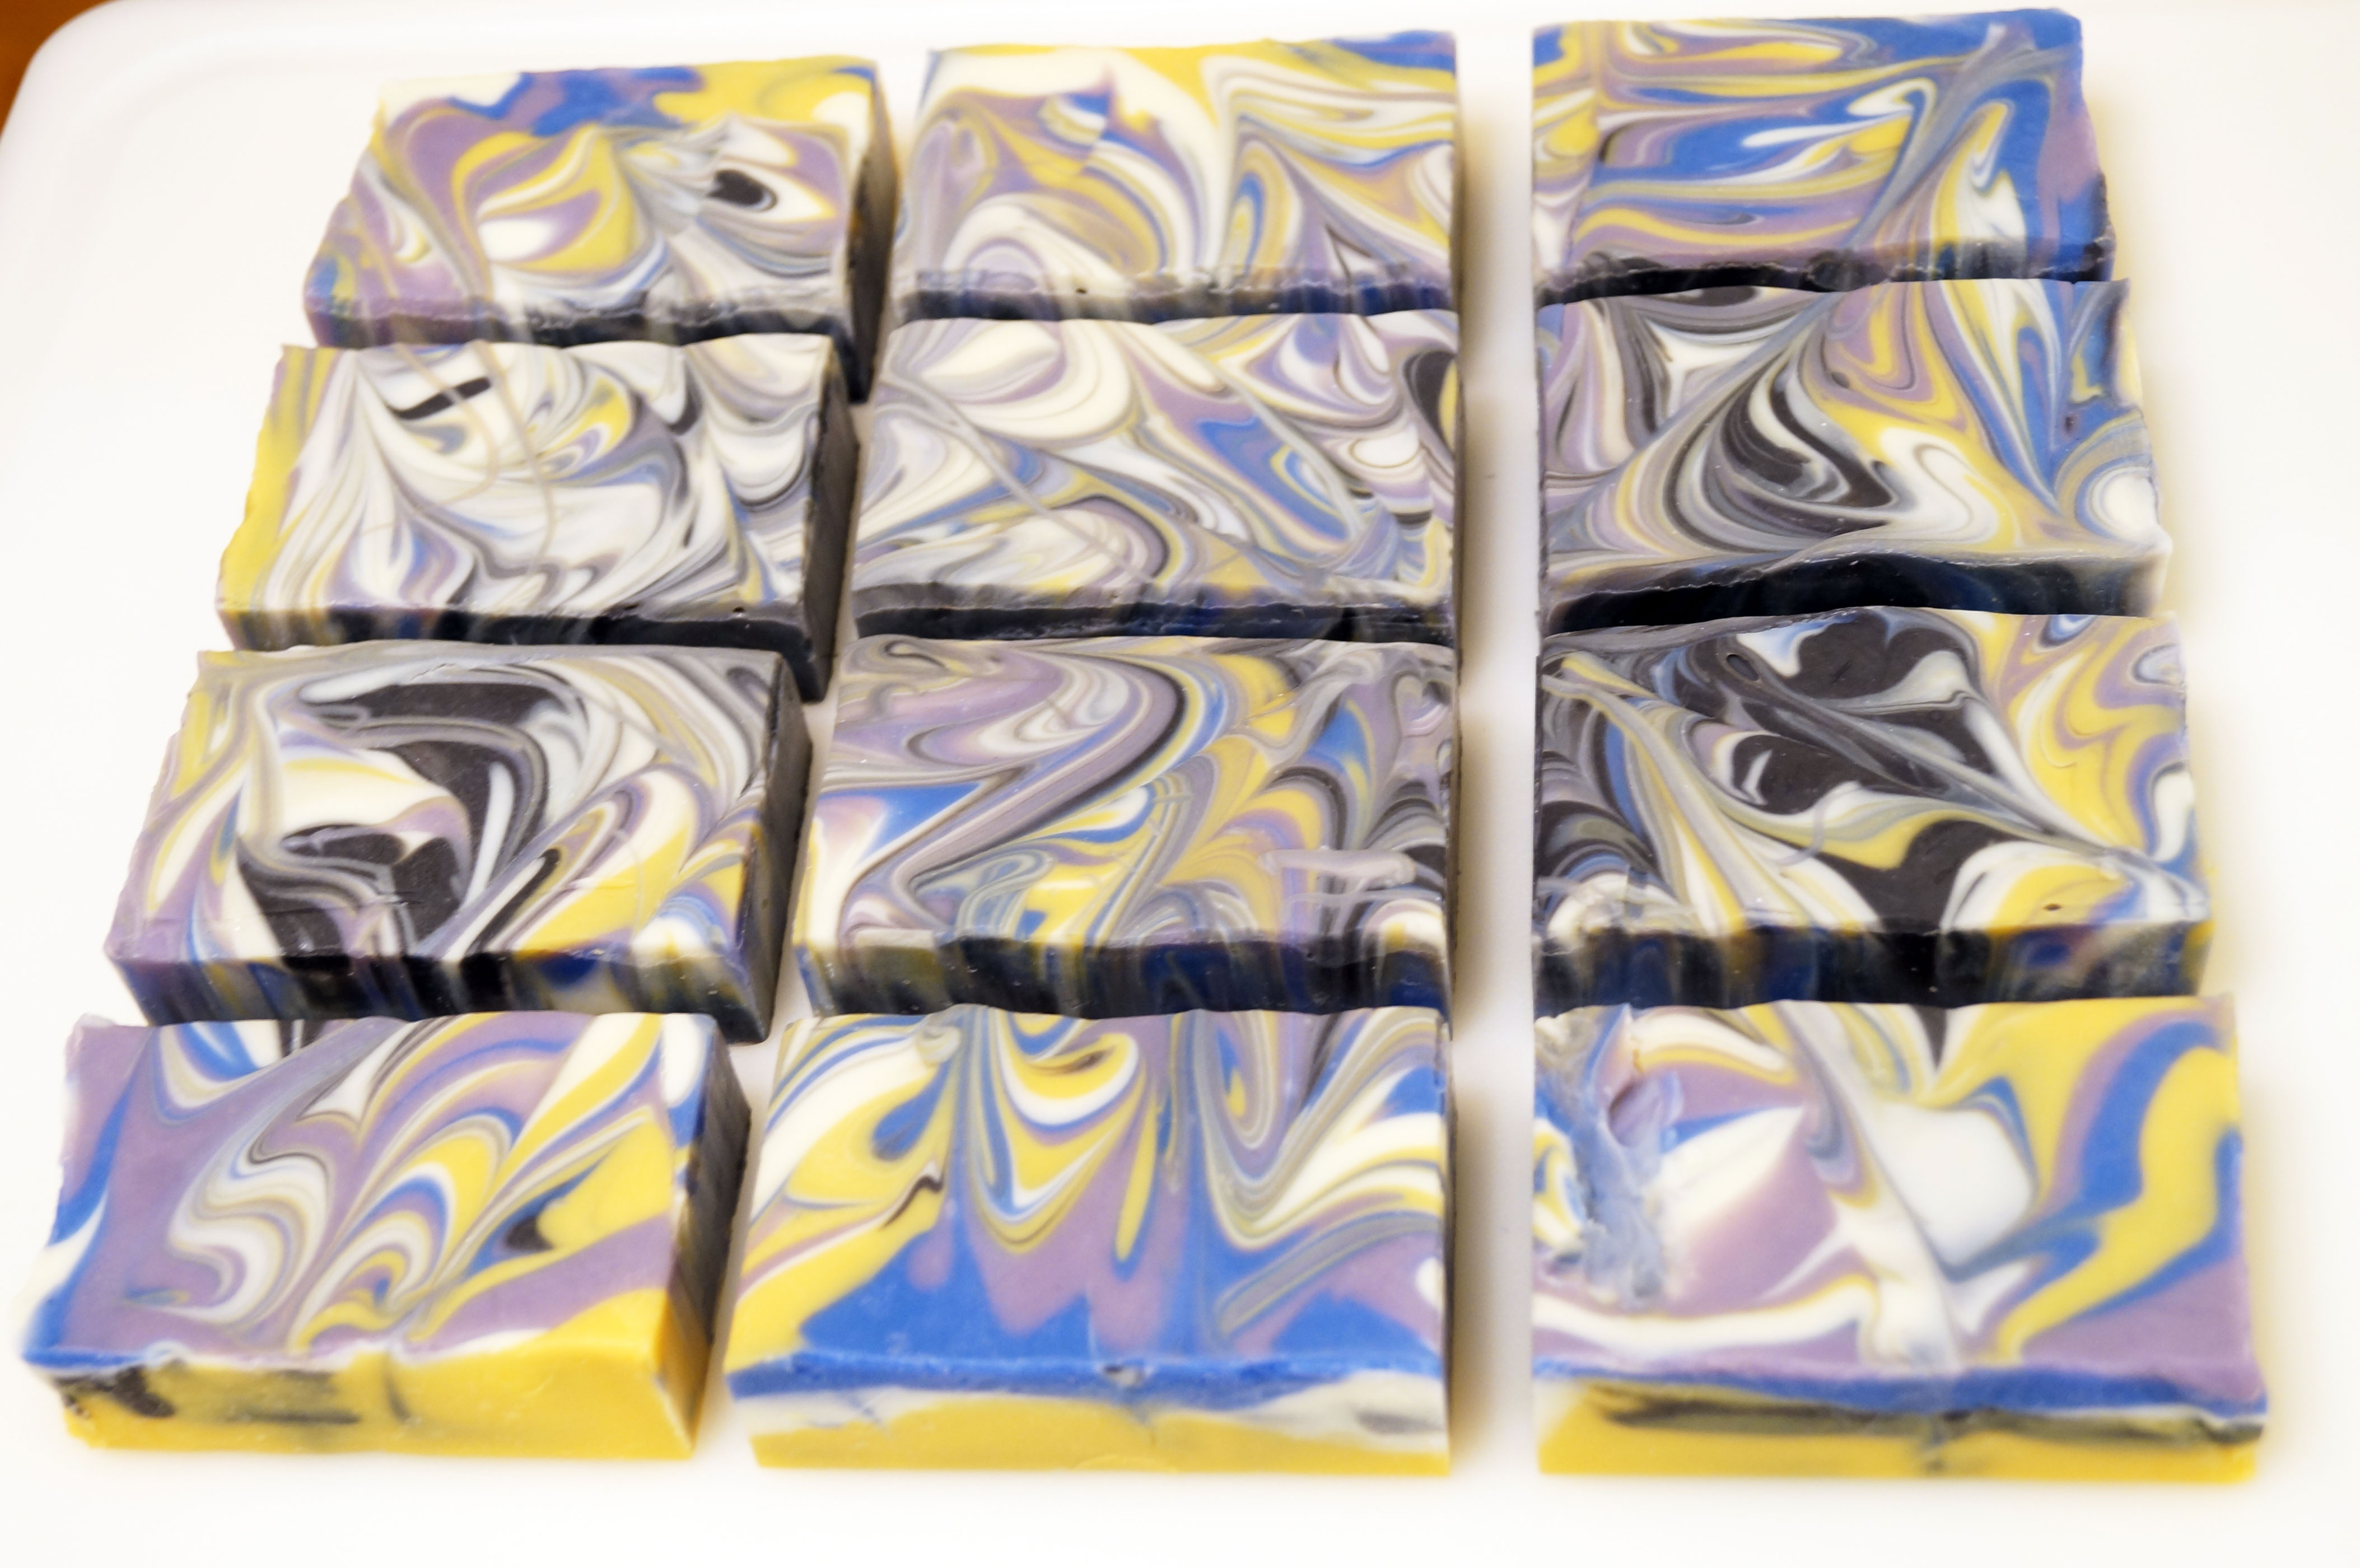
After 24 hours, the soap was still very soft. It was very helpful to have a mold with removable panels. Lining the mold with freezer paper also helped with soap removal. I had to be extra careful because it was easy to dent the soap.
Column pour soap out of mold after 24 hours
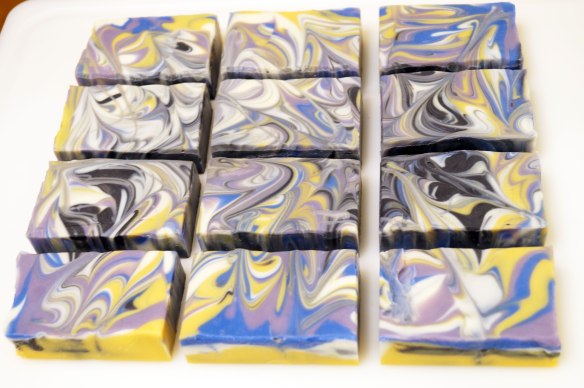
All lined up and ready for cure!

Column pour soap ready for curing rack!
Not bad-looking for my first column pour. I want to try the column pour technique again and execute my original vision. I was probably just too slow in getting things mixed, staged and ready to go.
I am still happy with the outcome and the scent is amazing. I also can’t wait to see the other challenge participant soaps out there!

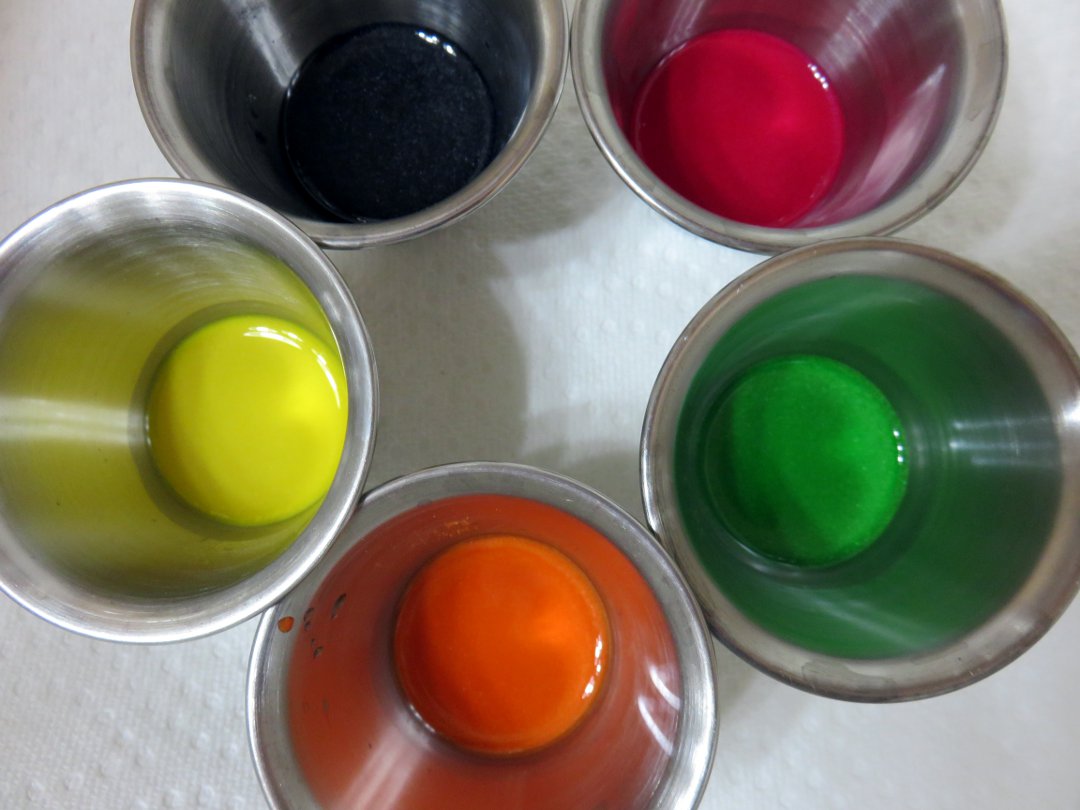
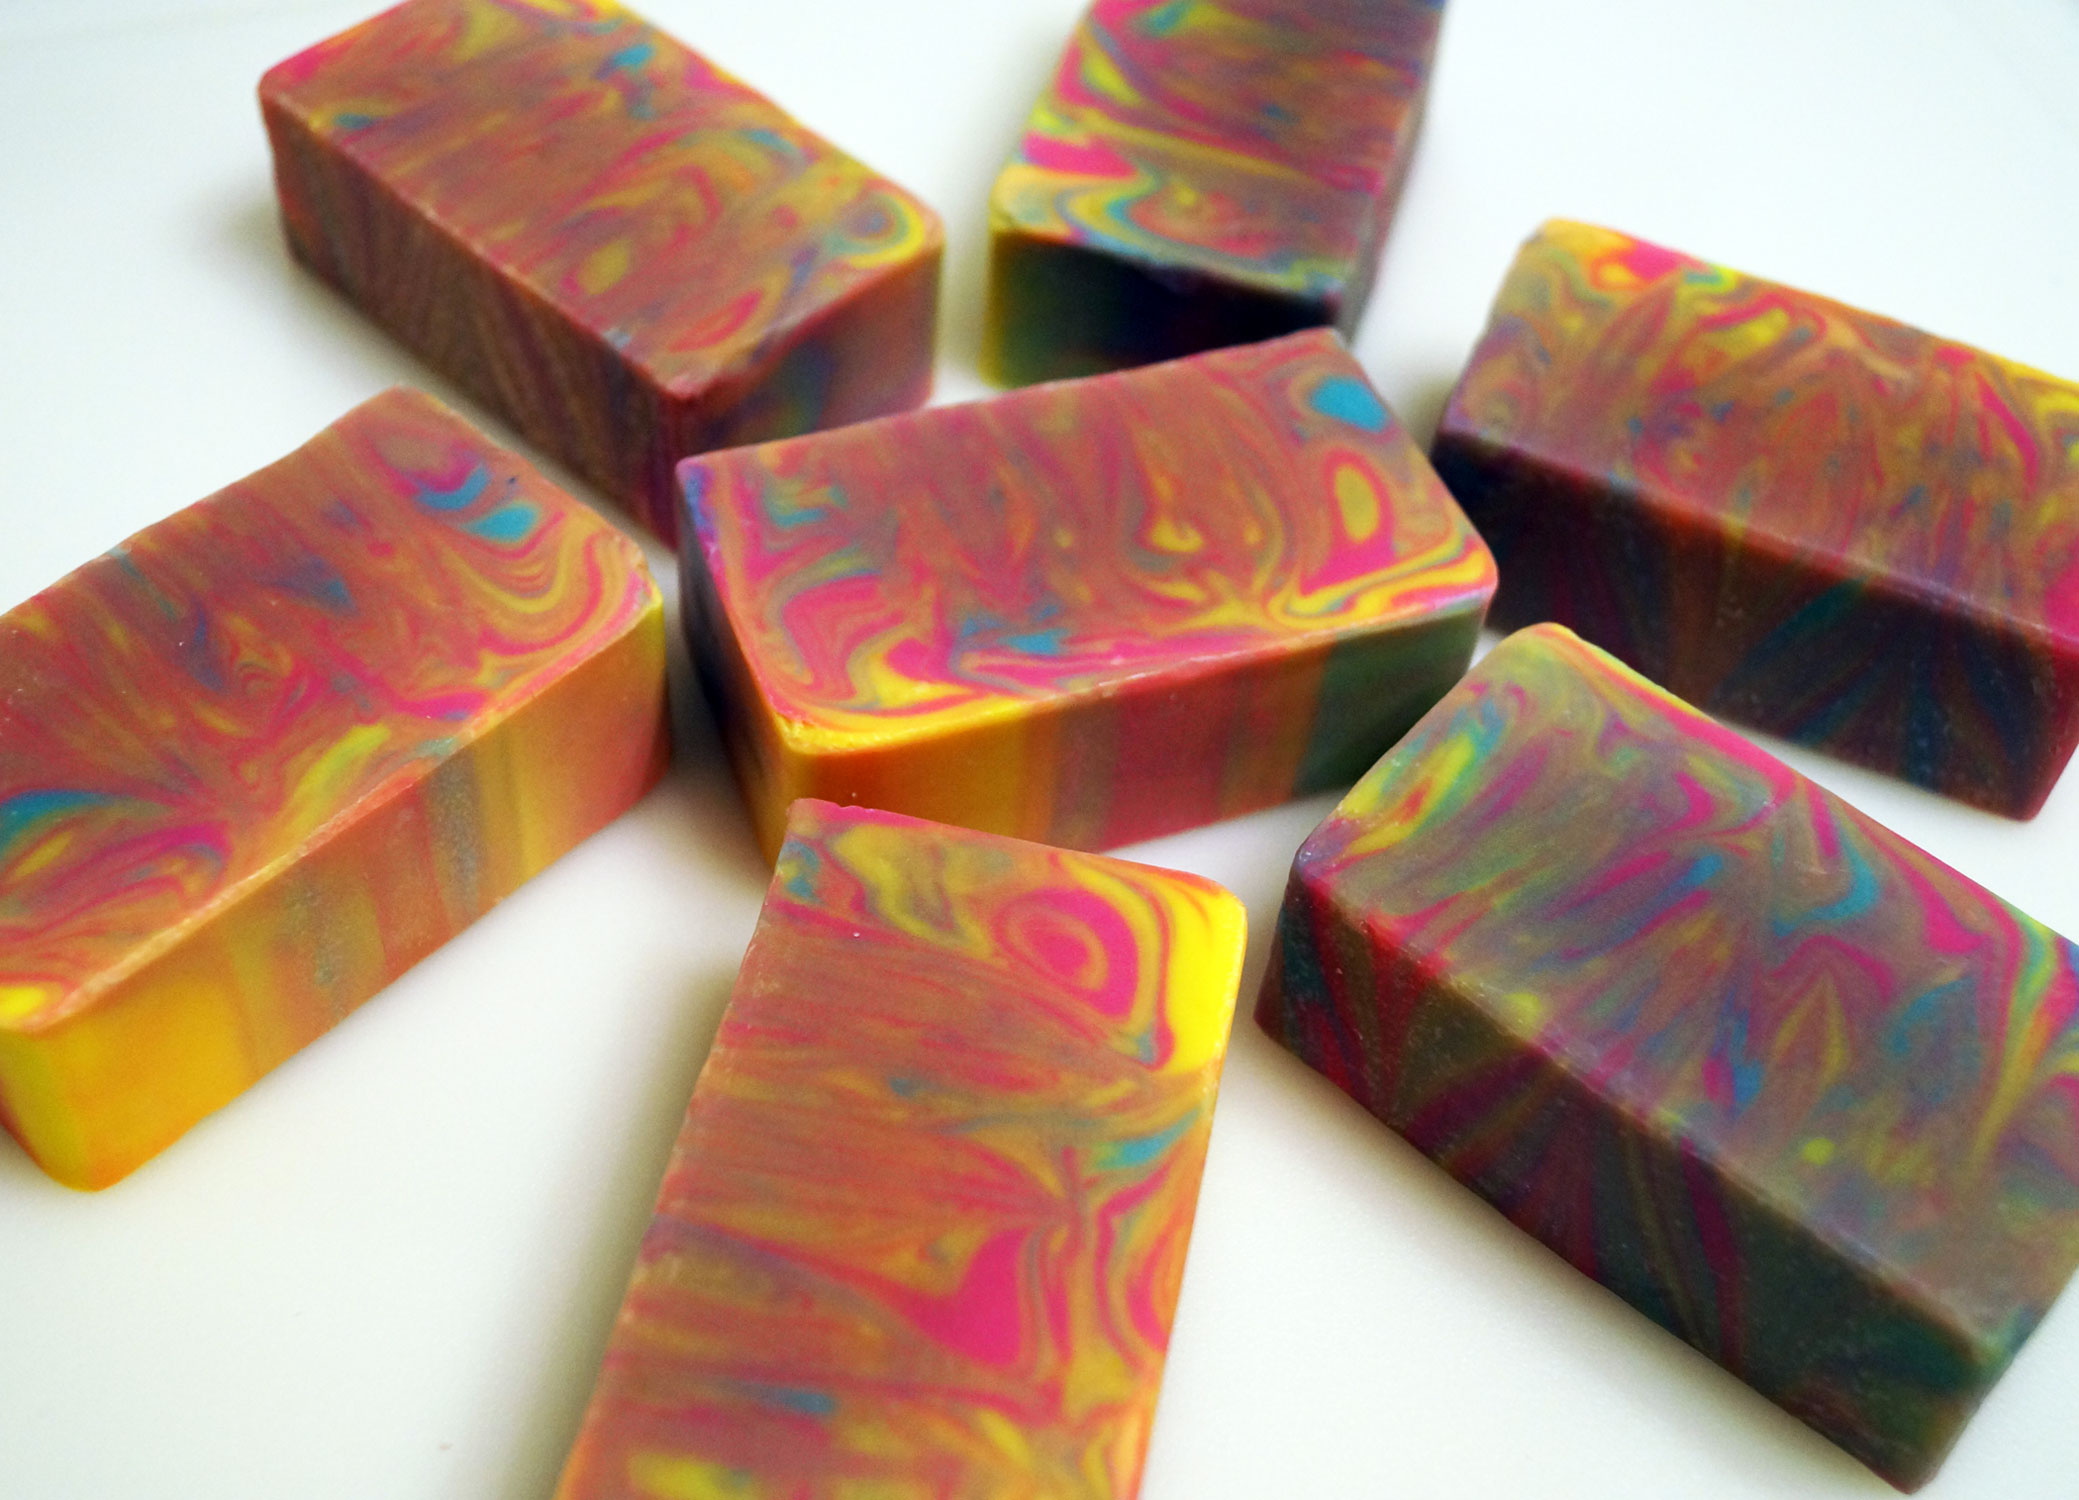
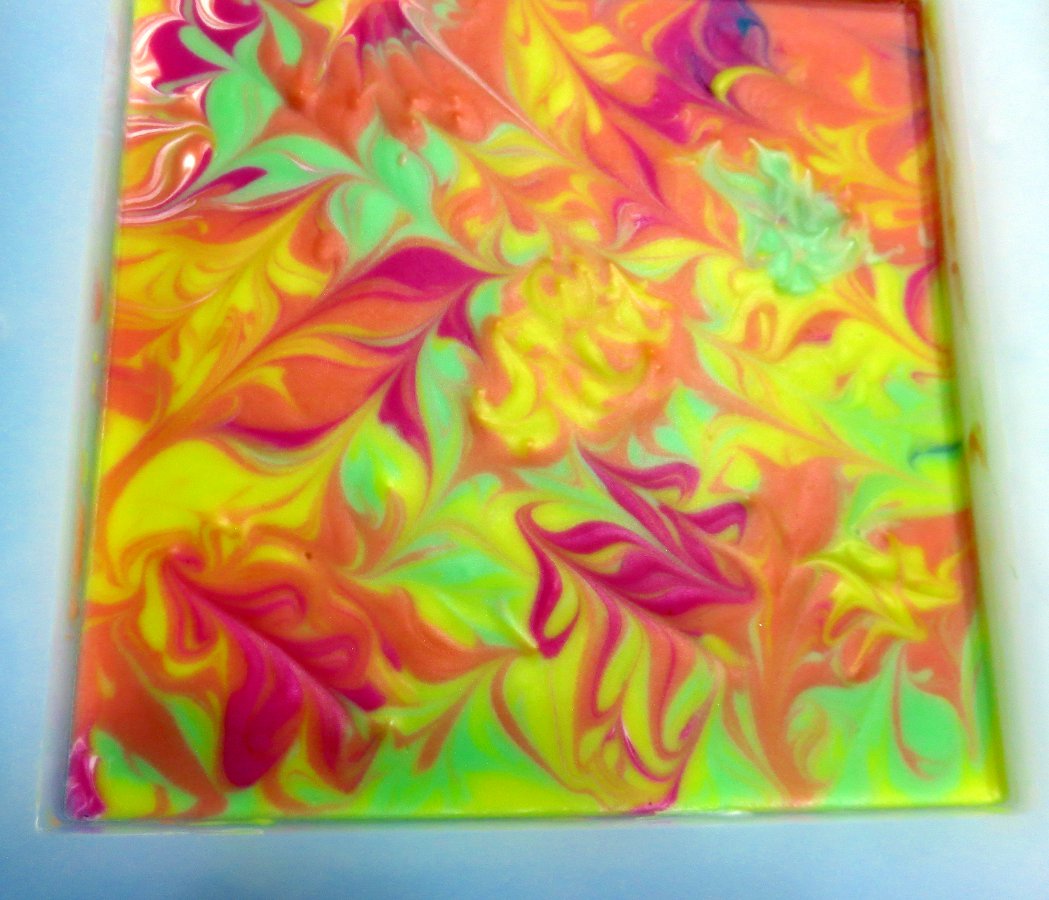 Time does fly by doesn’t it! I just finished my masters and final exams last month (yay!!!) so now I have some time to experiment with soap art. This month’s challenge was to do a soap design using an Ebru (paper marbling) technique. Here is my color palette after mixing the black, yellow, orange, green and dark pink micas.